Create and Manage an IAM user(AWS)

Creating an IAM user with security considerations is an essential task every AWS user should know how to do. In this tutorial, we'll go over how to create an IAM user and connect to the CLI.
Configuring AWS environment
This section takes you through installing and configuring the AWS command line(CLI). For everything that can be done on the AWS Management Console, we can use the CLI also.
To install AWS CLI, follow the instructions based on your operating system (https://docs.aws.amazon.com/cli/latest/userguide/getting-started-version.html)
Note: I am using a Unix system for configuration.
Verify that the CLI is properly installed by typing the command. You should see the version, in my case 2.11.1 is installed.
aws --version
Create User
Let's create an IAM User and grant it permissions it needs to access the right AWS resources. It is not advised to use the root user for security reasons. Find out more about how it works https://aws.amazon.com/iam/.
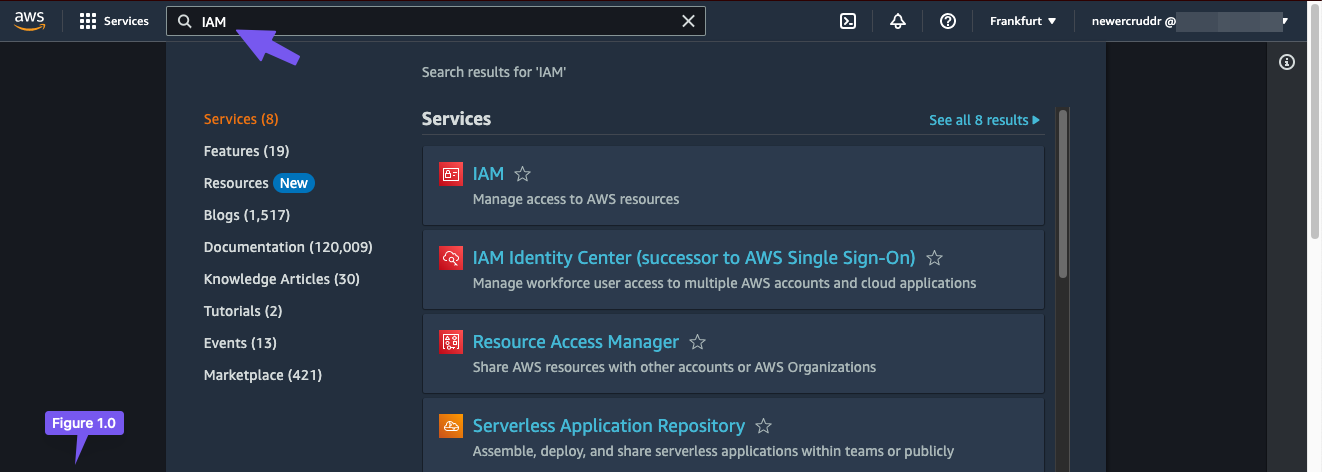
Sign in to AWS Management Console then type IAM in the search bar and click on the result to take you to the IAM dashboard as shown in figure 1.0.
From the left menu, choose Users. Click the Add User button. Then set a name for the user and create the password depending on your preference(also select AWS Management Console access if you want the same user to have access to the console), as shown in figure 1.10.

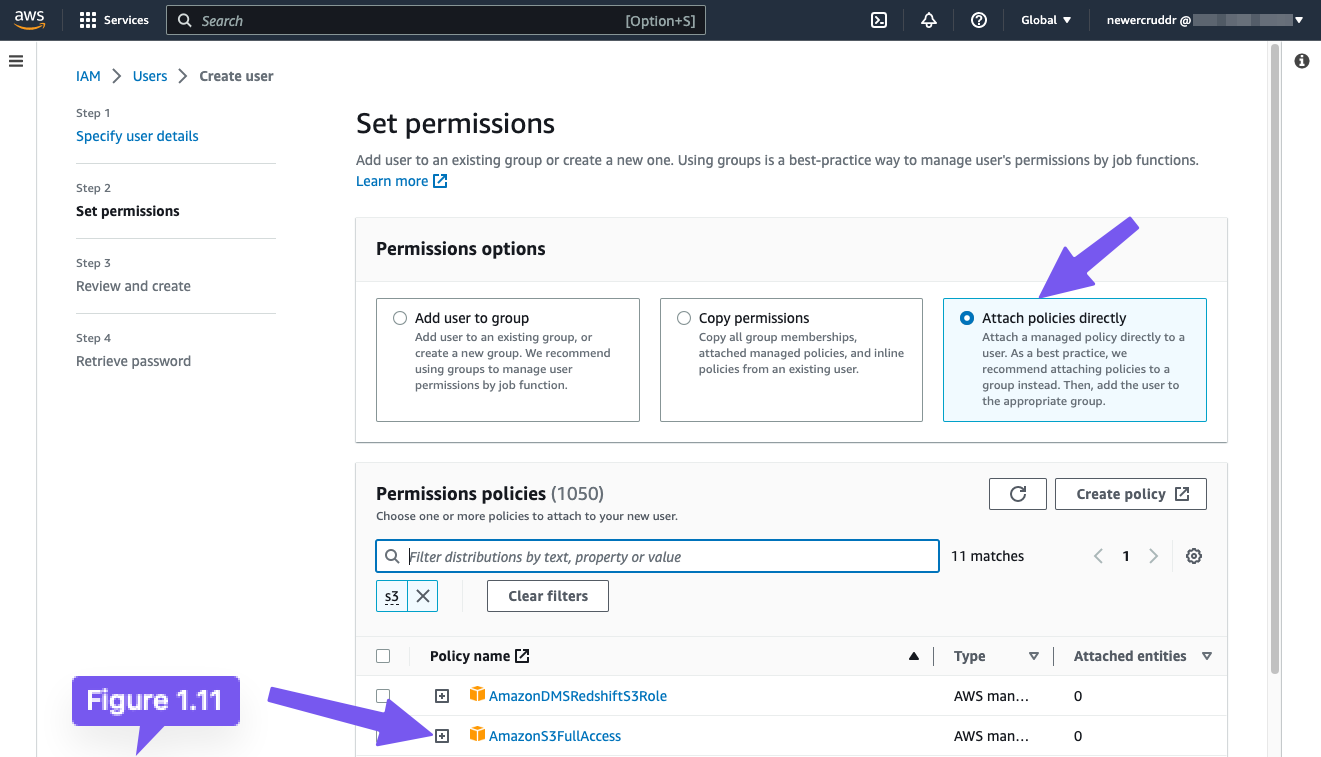
In the Set Permissions section, assign a policy to the user. In this case, the AmazonS3FullAccess policy, as shown in figure 1.11. If you already have a user group created with the same policy, you can select it instead.
On the next page, you can review and create your user. You can optionally add a tag to the user.

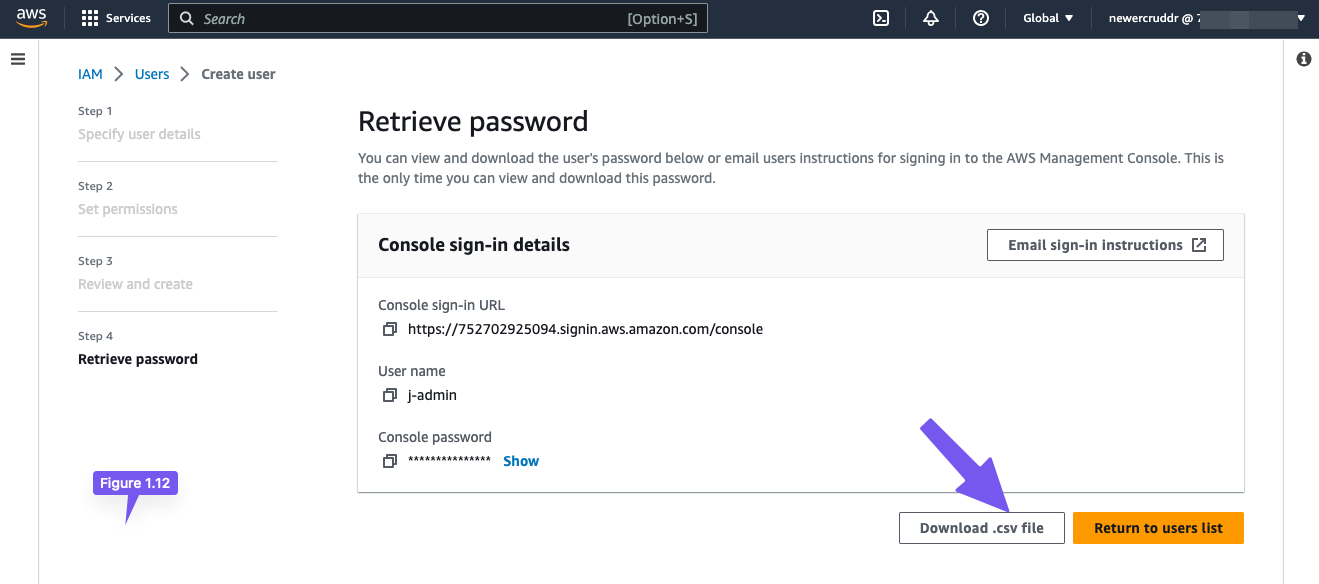
On the final page, you should see the user’s console sign-in details(figure 1.12). You can download the .csv file which contains the details.
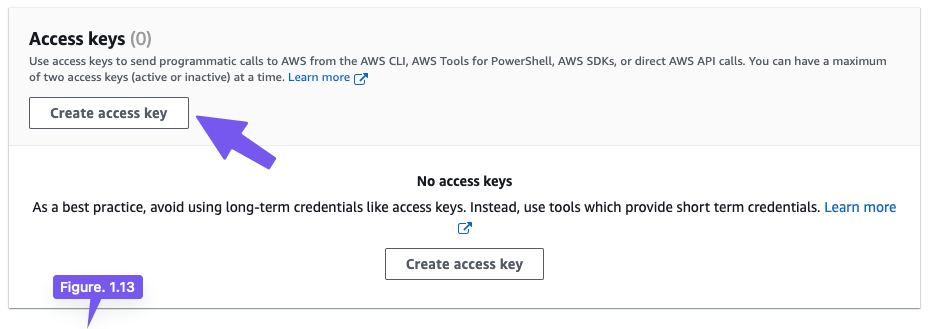
Return to the users list, the new user will appear, and click on the user to get its details. To allow access to this user from the CLI for programmatic access, we proceed to create an access key under Security Credentials.
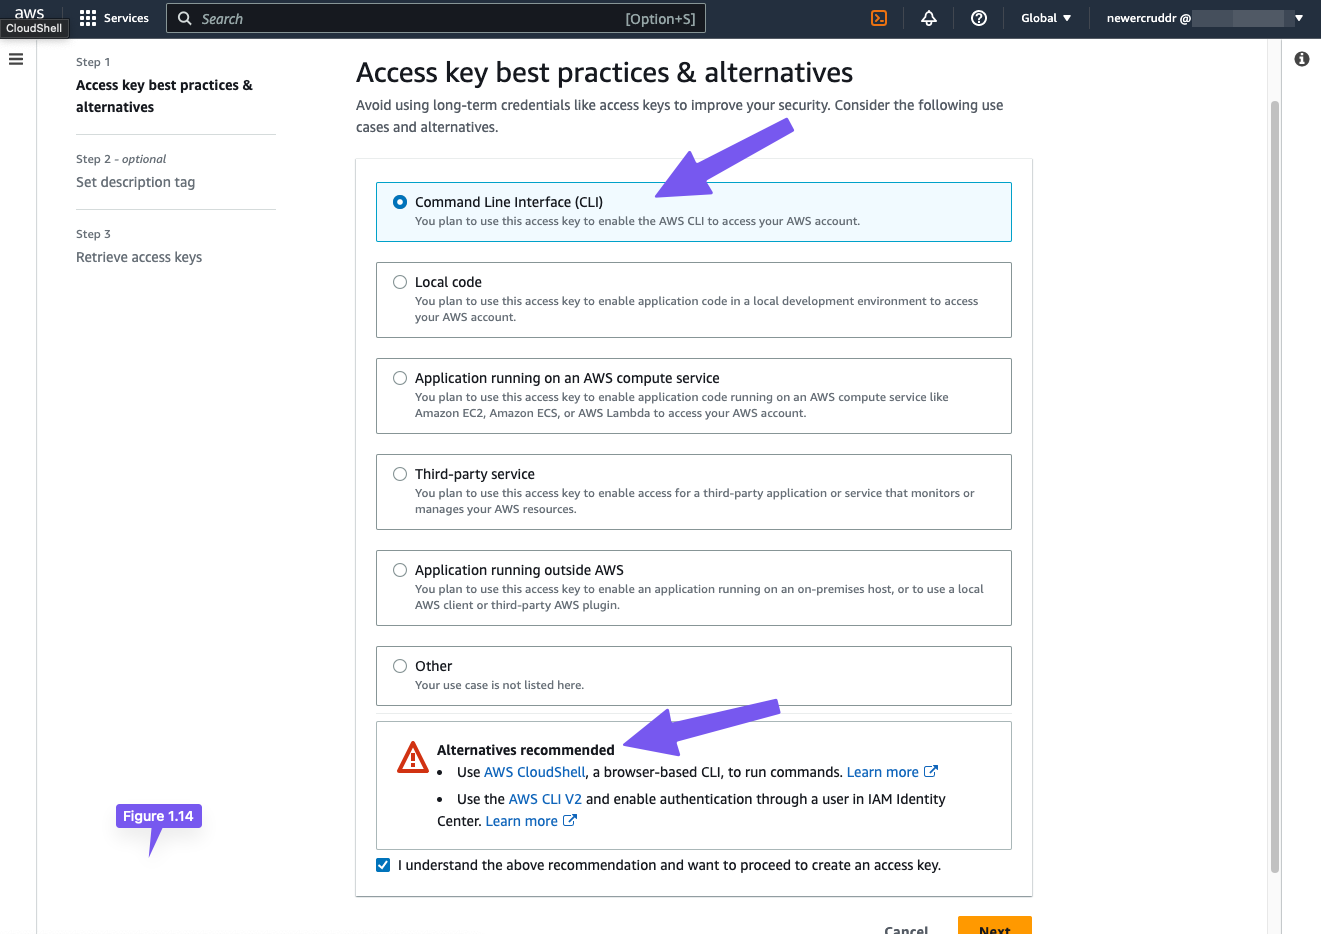
We can then choose how to use the access key shown in figure 1.14 and click next. In our case, we want to be able to use it via the CLI.
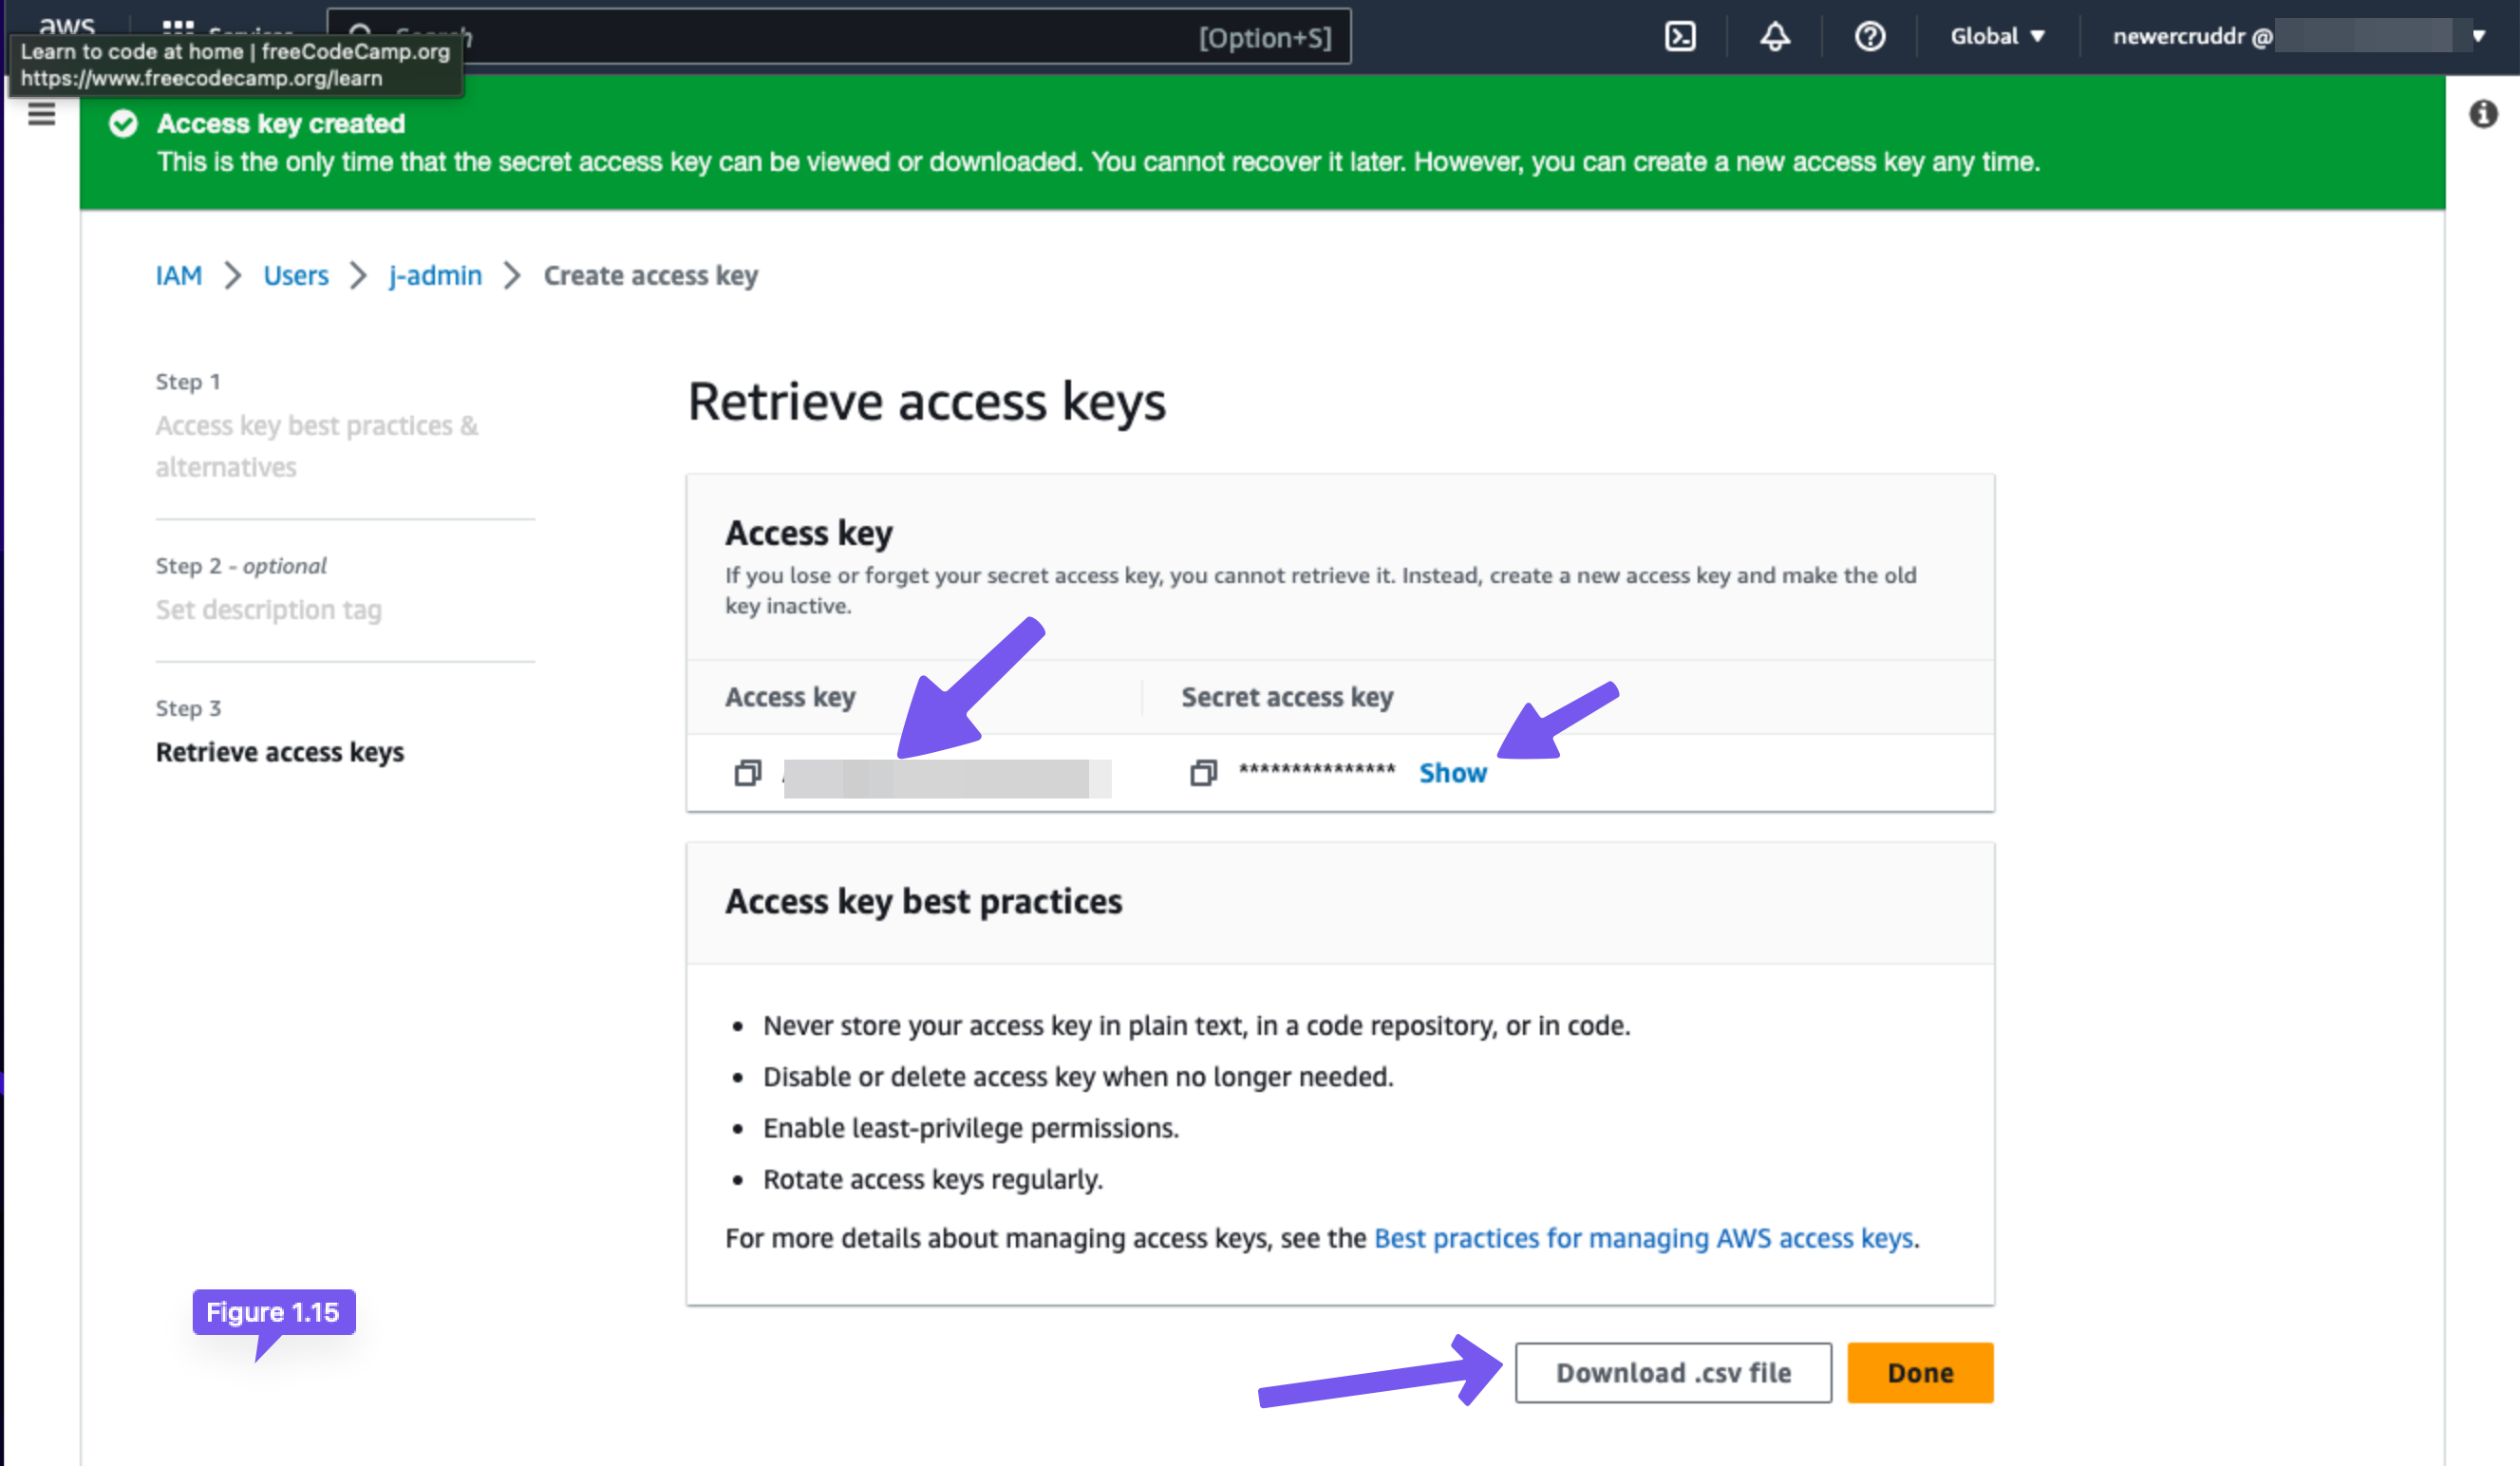
In the last section Retrieve access keys section, you can view your access and secret access keys. The recommended way to save these keys is to download .csv file as we won't be able to see it anymore.
Connect to AWS CLI
Now that we have everything we need, let's configure the AWS CLI using the command.
aws configure
Enter the details as prompted in your terminal. Depending on your location, use your default region.

The CLI will store credentials specified in the preceding command in a local file under ~/.aws/credentials (or in %UserProfile%\.aws\credentials on Windows) with the following details.
That should be it, and we have our AWS environment set up.


